Halloween doesn’t have to be scary, make your own decorative mesh wreath for less than $15!
**I was compensated for this post. This post also contains affiliate links and I will be compensated if you make a purchase after clicking on my links.**

Dollar Tree is one of my favorite stores to shop for just about everything from food to holiday decor DollarTree.com, offers a wide variety of products that fit every budget. One of my favorite things to make from the dollar store items is decorative mesh wreaths. I am slightly obsessed with them you could say and I’ve made one for every holiday thus far. However, I think my Halloween one is my favorite so far!
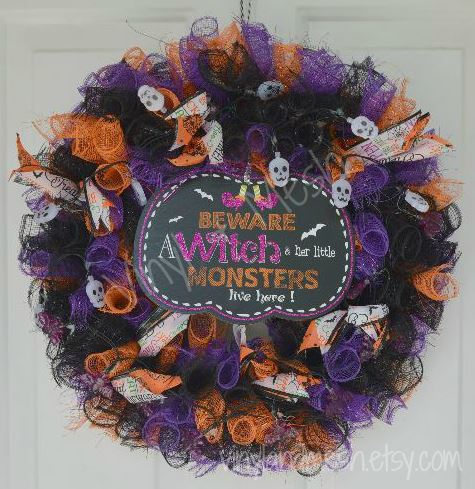
I created this Halloween deco-mesh wreath for less than $15 and a few hours of my time. What I love about creating my own wreath is I can do whatever I want with it.
For this DIY you’ll spend less than $15 to create this look. You’ll need:
1 14″ wire wreath ring
2 rolls of 9ft Halloween wire ribbon
2 rolls each of orange, black and purple decorative mesh
2 sets of string Halloween lights
1 sign of your choice
1 package of pipe cleaners
Total project cost: $14
Instructions:
Start by adding the pipe cleaners to your wreath ring for each section I add eight pipe cleaners. The more you add to each section the fuller it’ll look. Twist the pipe cleaner around to secure it to the ring leaving two open pieces. This is how you’re going to add the mesh to the wreath. I cut my mesh six inches long a rotary knife works best but if you don’t have it scissors work just as well.
You’ll need forty-two pieces of each color, typically this usually make-up two small rolls. I like to use clothespins to roll my mesh that way it makes it easier and takes less time overall. Use the open end of the pipe cleaner and put the bunch in and twist it to close. Then take the two ends and loop it through the back of the wreath. This will hide the pipe cleaner and don’t worry if you see the pipe cleaner when you’re done you can fluff it if you need to.
Continue until you add all the mesh to the ring. Then cut the first ribbon 6 to 12 inches long, then cut the second color smaller than the first. To get the open look bend the ribbon at the end of cut a triangle out. I add a pipe cleaner at the end of each section and bunch the ribbon at the end and secure it on. Then open it and adjust as desired. Add lights if necessary, you’ll need 2 AA batteries for each set then add hot glue to secure them into place. You can add a sign to your wreath for an added touch I secure my signs with glue or pipe cleaners.


Jacqueline is a thirty-something mother to five children under the age of twenty. While she’s not busy attending to her large family she enjoys writing about organization, crafts, and DIY projects, creating recipes, and blogging about her family.
Leave a Reply